
Introduction
I recently bought an Avistar Elite .46 ARF by Great Planes for flying with a flight instructor at my local hobby club. Before we went to the club and start flying, he and I (mostly he) made some adjustments to the plane for getting the perfect trainer for me. Basically, I changed some settings to get better results from the stock options.
Here are all the modifications that I did to make this trainer the perfect plane.
Modifications
Small battery pack
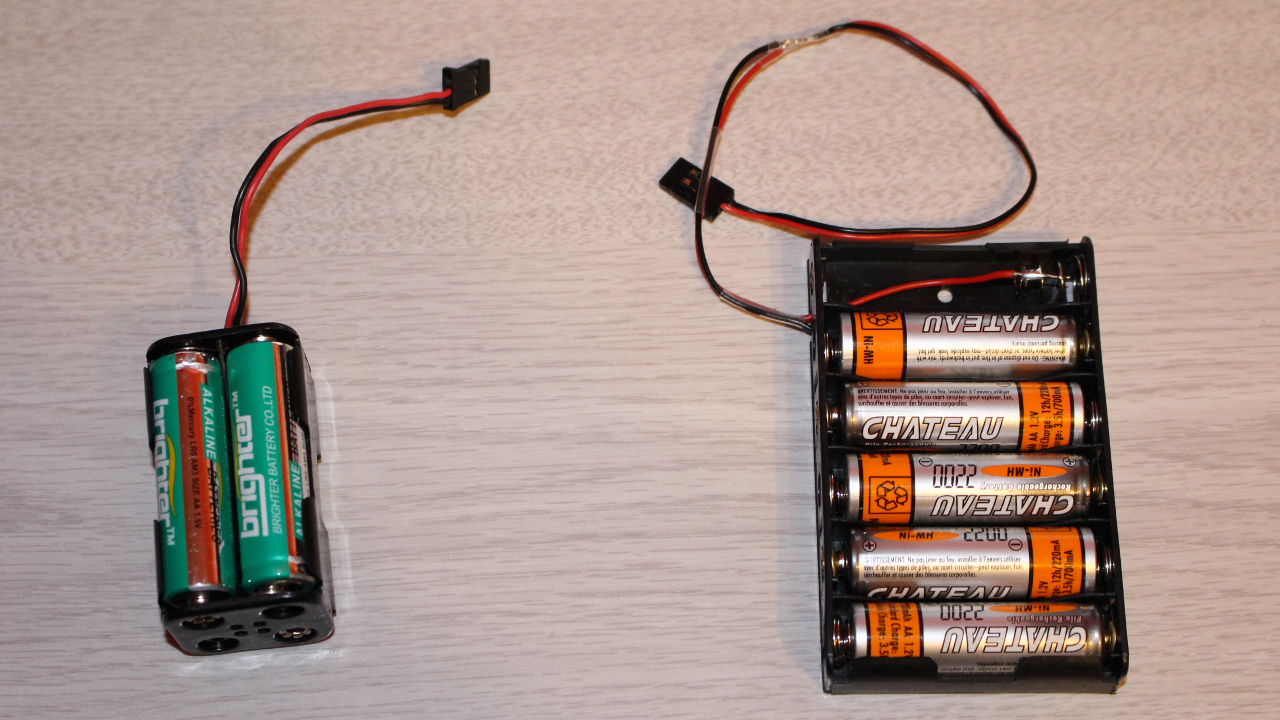
Avistar Elite battery socket replacement
The plane is equipped with a 4x AA battery pack for powering the receiver and the servos. The provided alkaline batteries are also no-name. That combination is in my opinion a little risky knowing that some receiver like the Spektrum can cut completely if the total voltage drops too low (I think its 4.8v but not quite sure). At full speed and during aerobatics, all the servos are stimulated and they can draw more than 1A of power during a small amount of time. I have tested the batteries at 1A and the voltage drop dangerously low.
The solution to this issue was to change the battery pack for a bigger one. I used a 6x AA pack equipped with 5 NiMH batteries (total of 6 volts). I’ve tested the setup at 1A and the voltage is steady like a rock.
Battery holder
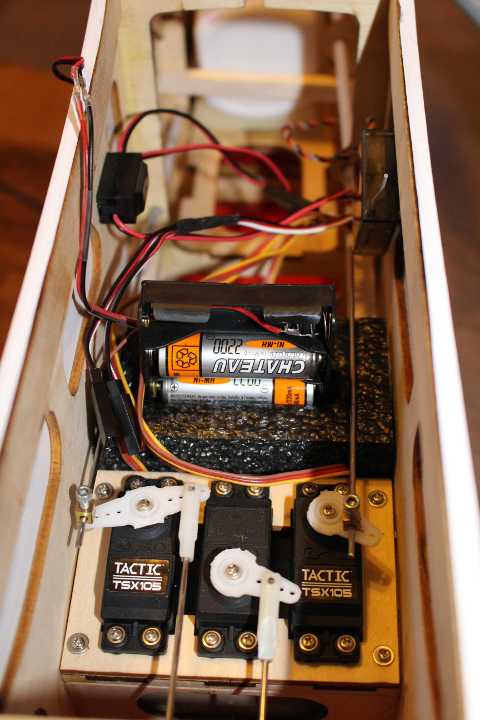
Avistar Elite with battery pack installed
The stock battery is held in place at the bottom of the plane with a velcro strap. It is not easy to access and remove the batteries with my big hands is harder than it should be.
Since I changed the battery pack, the space at the bottom was now too narrow to store the new battery pack and I had to improvise a new way for holding the pack in place. I decided to squeeze the battery pack in a piece of foam hold in place with a wooden plate. That method revealed to be a quick and easy way to install or take off the pack for charging.
Here is a picture of the foam holder without the battery pack:
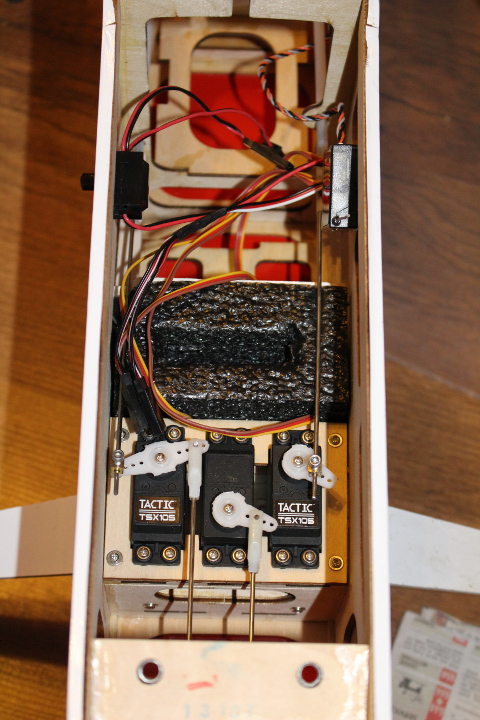
Avistar Elite without battery pack installed
Fuel tank
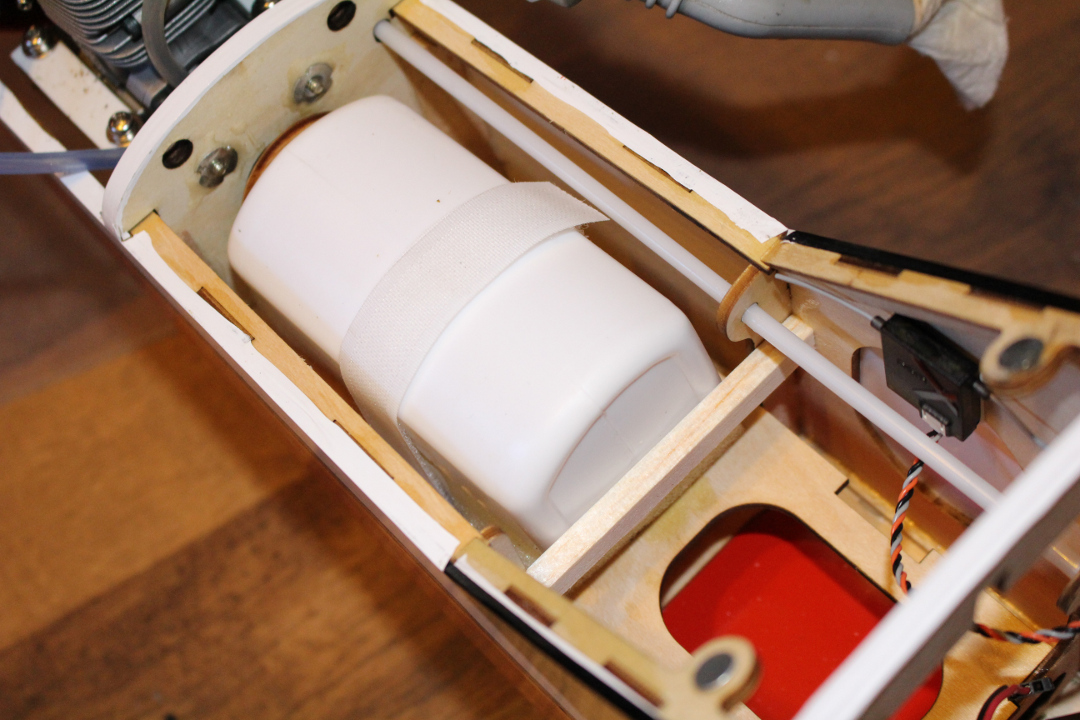
Avistar Elite fuel tank
In my opinion, the fuel tank is too much loose in the fuel compartment to be left as-is. Since the plane is a trainer, it must support hard landings, or quick maneuvers that could move the fuel tank and considerably change the center of gravity.
There is a reasonable explanation to this: the plane can be converted to an electric plane easily (the instructions are also available on the official web site of the Avistar Elite. The fuselage must than be big enough to hold a fuel tank (which is higher but shorter) or the recommended 3350mAh electric battery (which is thinner but longer).
To solve the issue, I glued a small piece of balsa wood behind the fuel tank as a lock mechanism. It is not restrictive and I am still able to reach or remove the fuel tank from the fuselage.
Propeller
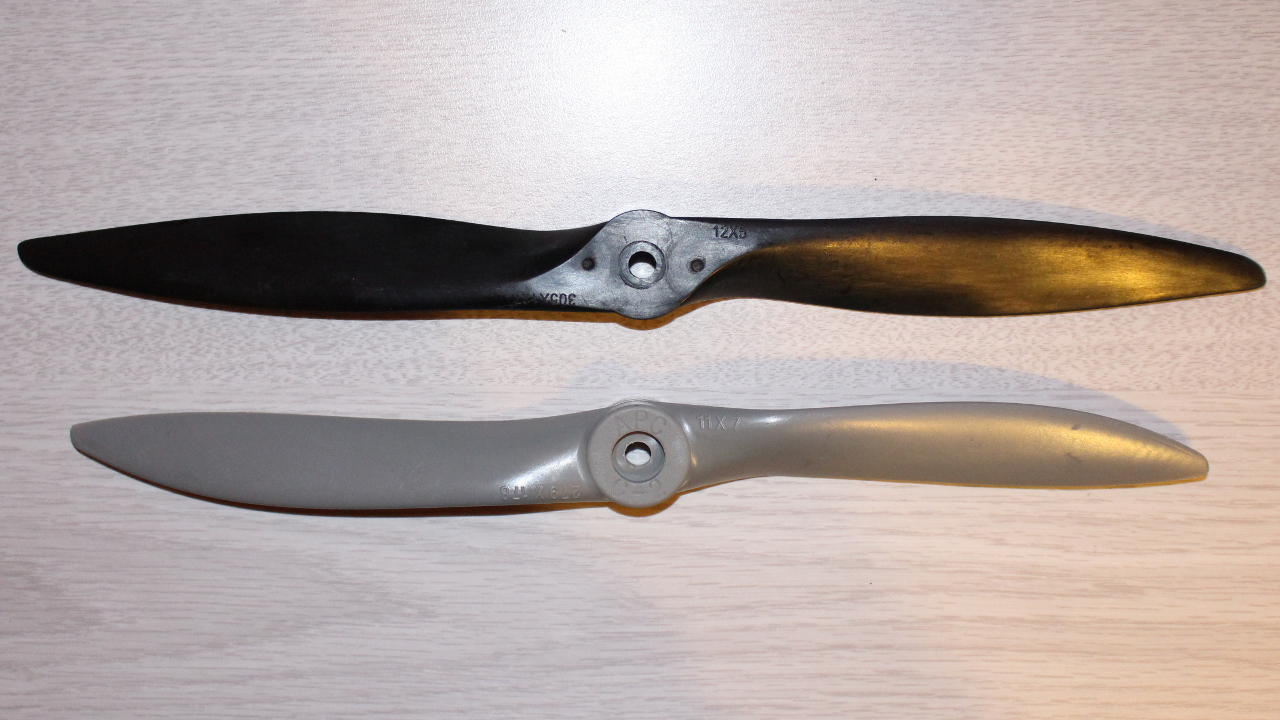
Avistar Elite default properller
The stock propeller is a 12×5 black piece of plastic. It is so thin that it can be bent with my fingers. I doubt it can survive a hard landing and it will break as soon as it hits the ground instead of resisting to the impact and stopping the motor.
Since the club I joined does not have an paved runway, I do have to take off and land on a grass surface which is not always perfectly flat. The best option for this is to try to clear as much space as possible between the propeller and the ground.
For these reasons, I decided to change the propeller for a 11×7 which is shorter and thicker but roughly gives the same performance. It is a lot stronger and it survived all of my hard landing (except one… I’m not perfect!)
This type of props is cheap (low price) but made with high quality plastic. Each one can be bought for only 3-4$.
Front wheel
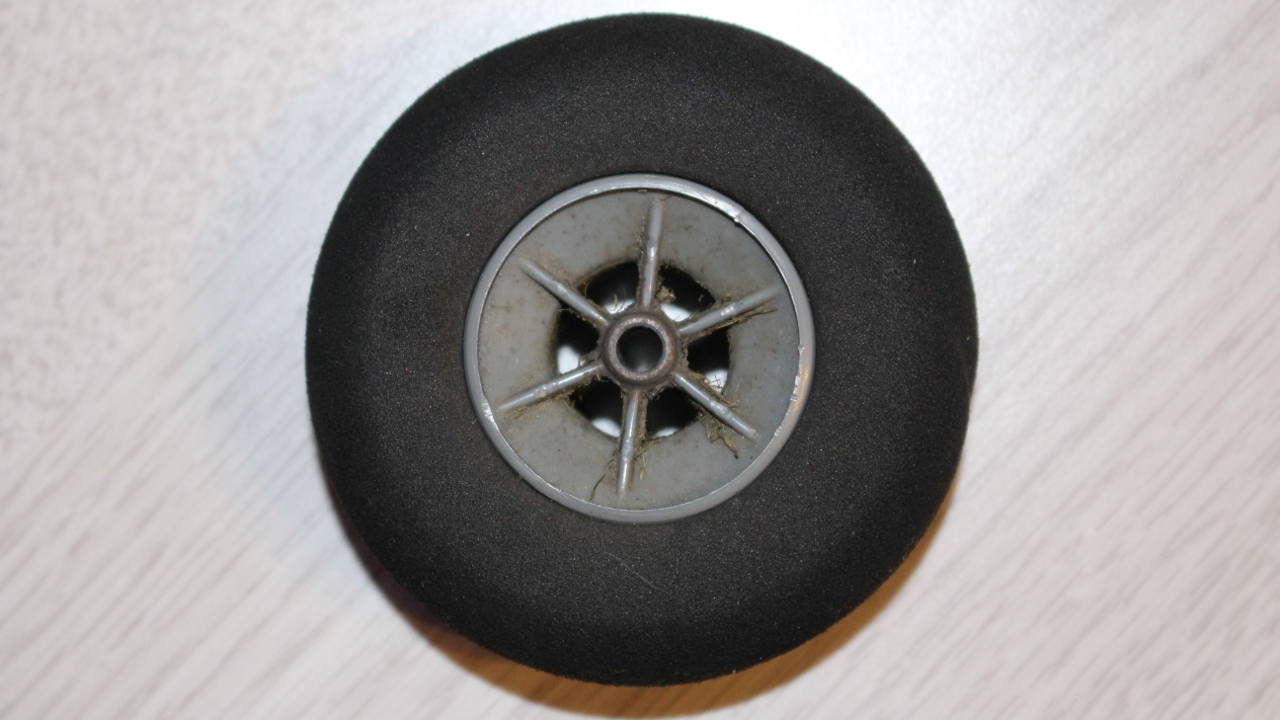
Avistar Elite replacement wheel
The same thing applies with the front wheel. The stock 2¼” wheel is not bad and does its job. However, since I wanted to clear as much space as possible with the ground, I decided to go for a bigger front wheel and installed a 2¾” wheel.
Elevator Tail
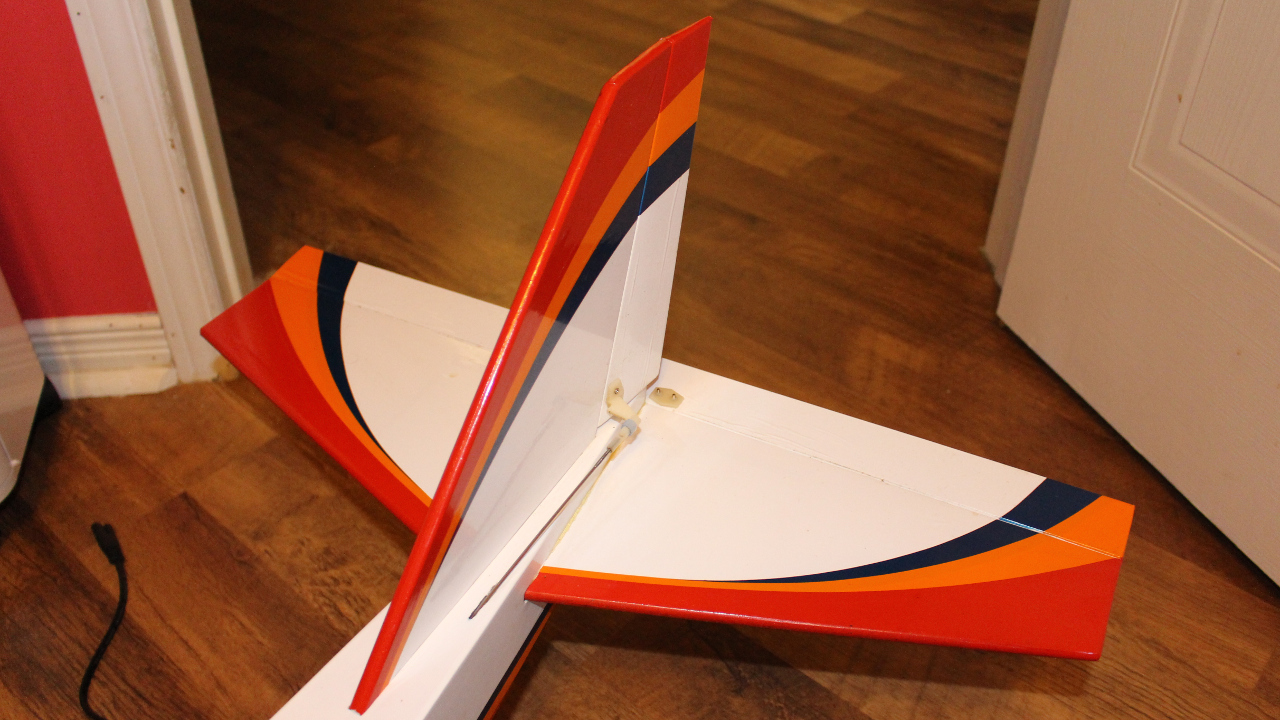
Avistar Elite tail view
The assembly of the elevator tail and the rudder is a good idea but lacks rigidity. When assembled with the suggested method, the elevation tail can move left and right and that is something I cannot trust.
If you follow the assembly guide, it is actually really easy to assemble the elevator tail and the rudder to the fuselage: You slide the horizontal tail through the fuselage and align the horizontal tail’s groove with the fuselage. Then you slide the rudder down the fuselage, through the elevator tail groove, back trough the fuselage and you secure everything with 2 bolts.
This method secures all the tail parts with each other but it does not prevent the tail from moving. To solve this problem, I simply glued the horizontal tail with the fuselage using epoxy. Here is a close up of the result:
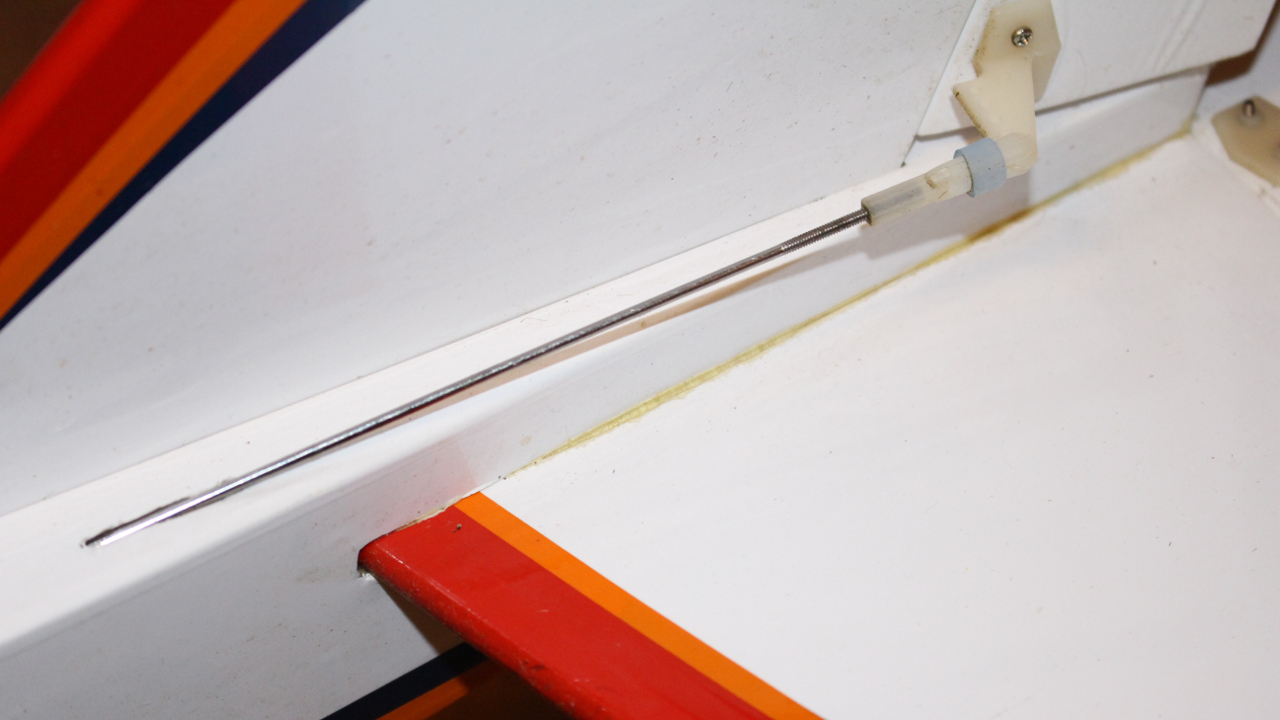
Avistar Elite Tail close up view
This choice is preventing me from dissembling the tail after a crash to make repairs to the push rods or another kind of modifications but I prefer it that way.
Wings

Avistar Elite black wing stripes
I am a beginner pilot. The bottom side of the wings are completely white and the top side of the wings are mostly white with both front tips covered with red Monokote. I find them really hard to see in the sky. I had much difficulties trying to distinguish if the plane was rolling left or right when looking at them from below.
I modified the appearance of the bottom side of the wings and added two black Monokote stripes to each ends of the wing. The stripes are 9 inches long which makes the plane less attractive but now the rolls are far more easy to distinguish in the sky.
Silicone exhaust deflector
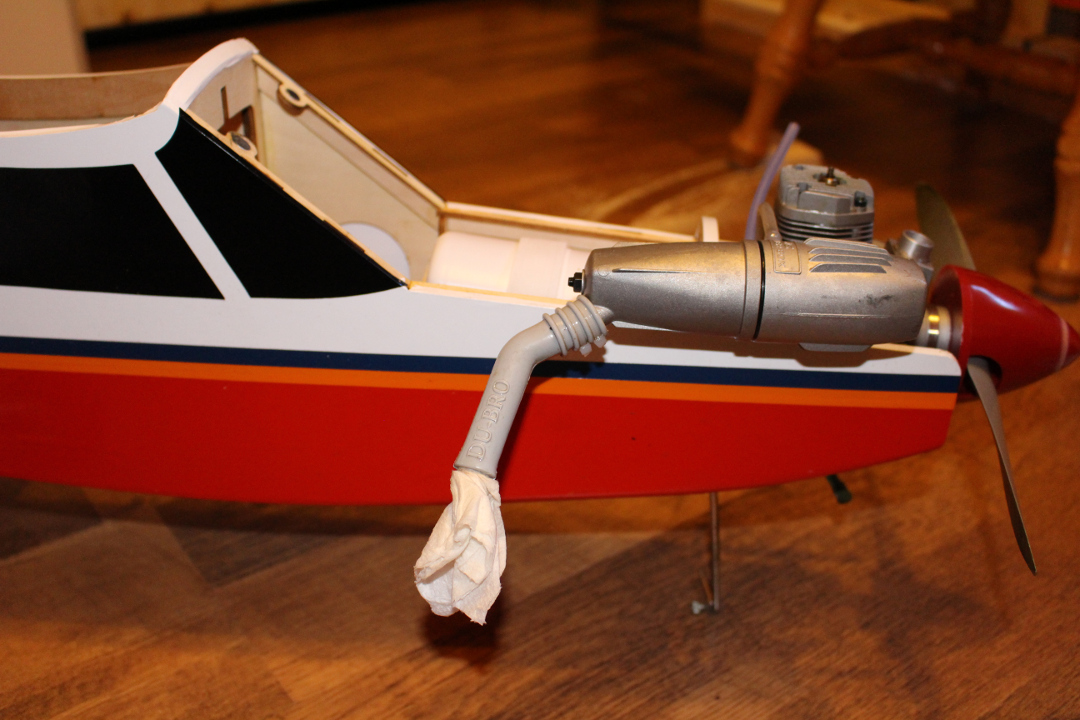
Avistar Elite Silicone exhaust deflector
The plane does not comes pre-equiped with a silicon exhaust deflector. Flying without a deflector is a mess because the side of the fuselage ends up full of oil. Simply add a deflector helps the plane stay clean and last longer. At the same time, the rubber extension is prefect for putting a cap to prevent any fuel leaks while the plane is stored.
Final note
These are all the modifications I have done to this plane to make it the perfect motorized trainer. Over time, I didn’t had to change anything to this setup and I am quite pleased to see the results. This plane fly smoothly and I enjoy flying it.
I am not a professional and I all these modifications are done as a suggestion only. Feel free to comment on changes I should make or things that you would go on a different route because I am always happy to see what bright ideas others could come up with.